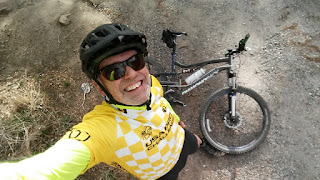
Last year, 2016, my son started mountain bike racing. Previously he'd done road racing with the FFKR jr. devo team up in Salt Lake City. He'd attended a couple of their training camps and got interested in cyclocross (CX) and even took state points leader in his age group in the 2015 fall racing season.
For 2016 he decided to race Mountain Bike at the Lone Peak High School registered with the Utah High School Cycling League and NICA. I decided to become a NICA certified coach, and passed the requirements for the Ride Leader position. This has been upgraded to Level Two Coach for 2017. More on that later though.
The team was sponsored by Fezarri and we decided to get him a Wasatch Peak hardtail at the team discount. I found a really good deal on a Diamondback Recoil full suspension bike and ordered it. It
was heavy, somewhat clunky, but it would get the job done.
Now, I'd been a roadie for a good 40 years. Seriously. No kidding. In my wild teen years in California I'd hooked up with a friend who introduced me to sweet light brazed lug double butted tube construction. I was hooked. Over the years I ended up as a bicycle commuter, hitting 150 mile weeks regularly. So now this big knobby tire thing. Argh!
Pretty soon after getting it, even on the light duty trails we ran with the beginner team I was in charge of, it became apparent that at my weight the rear spring, a coil-over design similar to a dirt bike but without the hydraulics, wasn't working out as nicely as I'd hoped.
I dug around on Amazon and found an air shock replacement from Asia that was way less than the "American" counterparts that you usually think of when imagining the perfect rear air suspension on a mountain bike. I won't name names. Like less than $80. The ratings for the DNM Rear Air Shock were good, so I measured my spring shock to verify the fit and ordered it.
The inner diameter and width of the supplied bushings was slightly off, so I pressed them out (tough, but doable with a clamp and threaded hex head bolt) and used the Diamondback bushings, which fit perfectly in the shocks.
The hardest part was holding the rear triangle up in place while holding the end of the shock in place, while threading the bolt through while keeping the bushing centered. Alone. Fortunately I had a good Bikehand Pro Mechanic Bike Stand to hold the bike in place at waist level while working on it.
The DNM shock included a fairly readable manual to let you know what pressures to load the main and rebound cylinders with, and I messed around with it for about a half hour to get the bike to settle in at the right pressure.
Total time for this was about 3 hours, while answering the phone, checking email, verifying a thing or two on Youtube, etc. You could probably do it in an hour or less without the messing about.
NEXT: Derailleur replacement. Drat.
 |
| Dallin at the awards banquet for 2015 UTCX |
For 2016 he decided to race Mountain Bike at the Lone Peak High School registered with the Utah High School Cycling League and NICA. I decided to become a NICA certified coach, and passed the requirements for the Ride Leader position. This has been upgraded to Level Two Coach for 2017. More on that later though.
The team was sponsored by Fezarri and we decided to get him a Wasatch Peak hardtail at the team discount. I found a really good deal on a Diamondback Recoil full suspension bike and ordered it. It
was heavy, somewhat clunky, but it would get the job done.
 |
| Diamondback Recoil 27.5 |
Now, I'd been a roadie for a good 40 years. Seriously. No kidding. In my wild teen years in California I'd hooked up with a friend who introduced me to sweet light brazed lug double butted tube construction. I was hooked. Over the years I ended up as a bicycle commuter, hitting 150 mile weeks regularly. So now this big knobby tire thing. Argh!
Pretty soon after getting it, even on the light duty trails we ran with the beginner team I was in charge of, it became apparent that at my weight the rear spring, a coil-over design similar to a dirt bike but without the hydraulics, wasn't working out as nicely as I'd hoped.
 |
| Spring Coil - stock on Diamondback Recoil |
The inner diameter and width of the supplied bushings was slightly off, so I pressed them out (tough, but doable with a clamp and threaded hex head bolt) and used the Diamondback bushings, which fit perfectly in the shocks.
The hardest part was holding the rear triangle up in place while holding the end of the shock in place, while threading the bolt through while keeping the bushing centered. Alone. Fortunately I had a good Bikehand Pro Mechanic Bike Stand to hold the bike in place at waist level while working on it.
The DNM shock included a fairly readable manual to let you know what pressures to load the main and rebound cylinders with, and I messed around with it for about a half hour to get the bike to settle in at the right pressure.
Total time for this was about 3 hours, while answering the phone, checking email, verifying a thing or two on Youtube, etc. You could probably do it in an hour or less without the messing about.
NEXT: Derailleur replacement. Drat.


Comments
Post a Comment